by jcastles | Mar 16, 2012 | Family
So today’s the last day of spring break. Let’s see…what did I do with the kids. NOTHING!! I totally sucked as a parent this week, lol!!
We went to the park a few times to try and feed the ducks….they just weren’t eating so that was a bust. We made cookies the other day and made peanut butter cap’n crunch bars (like rice crispy bars) today. We’ve cuddled and napped on the couch (uhhh, probably too many naps). But in my defense we had 3 repair appts this week so really half my day for 3 days was waiting on them.
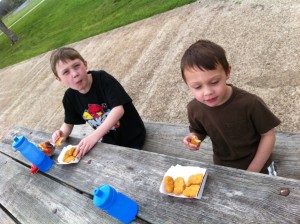
So let me document the 1 memorable fun time we had this week. We ate lunch at the park! We’ll call it the lazy mom picnic! McDonald’s nuggets for the kids and I got a Subway sandwich. Pretty awful huh?!


.
by jcastles | Mar 14, 2012 | Recipes
by jcastles | Mar 13, 2012 | Baby Shower
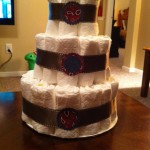
A friend of mine is pregnant and we had her baby shower this past weekend. I wanted to make this super cute motorcycle diaper cake for her but with all the other things I was doing I just didn’t want to mess it up and start all over….since I’d never even done a “normal” diaper cake, lol!
So I googled traditional diaper cake and there were sooooooo many tutorials. So many that at first I felt overwhelmed. As I kept looking at them I decided to just try it. Most tutorials said to rubber band every single stinkin diaper! Ummm, nope wasn’t gonna do that! So here’s my tutorial on making it easy! It took me about 20 min to make the cake itself and about 10 min to add the decor.
Items needed:
50ish diapers (I used 46 and they were size 2-pampers swaddlers; Bottom layer-25, Middle layer-15, Top layer- 6) I just kept adding diapers until it looked circle-ish)
rubberbands (I only used 3!!)
stick pins (6 at most)
ribbon (3 yds, i had a little bit left over too!)
embellishments (scrapbook paper in her theme is what I used)
scissors
12 inch wooden dowels (I used 2 to secure cake and 1 to add the name sign)
glue gun
cake board or platter (I used both to make but didn’t wind up taking the platter)
What to do:
Roll up each diaper and add to 1 rubber band. Yes all 25 of these diapers are held together with 1 large rubberband. The first few diapers you roll might need a roll touch-up towards the end since it’s hard for the rubberband to hold just a few at first.
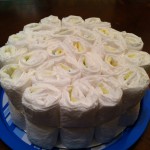
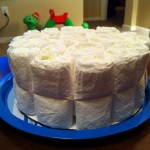
Make your next 2 layers (remember each layer I only used 1 rubberband).
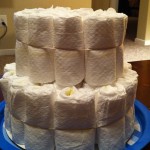
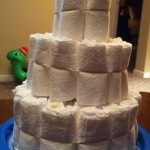
Next take your ribbon and add it around a layer over the rubberband. Once you wrap it around and it’s evenly over the rubberband add a stick pin to the bottom part of the ribbon (the part you started with. Pull the roll of ribbon tight and pin it to the ribbon on the cake and cut the ribbon (after where you pinned it).
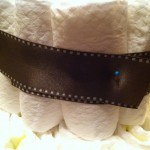
Repeat for all layers. Once done pinning I took the top pin out and added a dot of hot glue, pulled the ribbon tight again and placed on top of the pinned ribbon, push down so the glue will spread and stick.
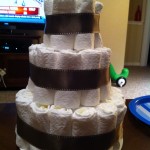
Add your dowels…somehow didn’t get a pic of this part. But all I did was shove them through the layers starting at the top layer.
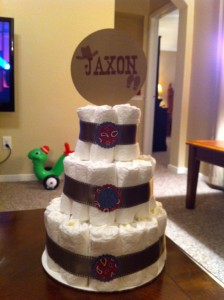
Next add your embellishments. I used scrapbook paper and used a 2 inch scallop punch and a 1.5 inch scallop punch. I then used a glue dot runner on the back and attached the smaller circle to the larger circle. I then added a dot of hot glue on the back to attach to the ribbon. I attached the circles to the part of the ribbon that was cut so it looks seamless.
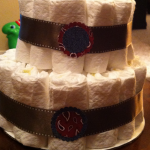
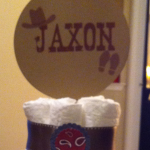
Next I had my hand dandy husband make a sign with the baby’s name and other images I liked. My favorite is the little boot prints (like baby feet prints). He made 2 of them so I could glue them together. I glued them to another wooden dowel with my glue dot runner and stuck the dowel down in the cake.
Voila…easy and simple looking diaper cake.
 .
.
by jcastles | Mar 9, 2012 | Birthday Parties, Family
Well I turned 32 the other day……it was a normal day, lol! Nah it was a little different. My hubbs had to work late so we decided to celebrate it the next day.
To start my actual birthday day off my husband got up early and made a trip to Starbucks (for my free coffee–sign up and get free coffee on your bday too!)!
Mmmmmm….then he left for work shortly after and I didn’t see him until after 9 that night. 🙁

So to start my actual birthday my husband brought home my FAVORITE cupcakes!!
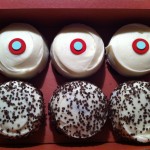
Looks delish right?!! Well they were! My hubbs made sure I got 3 and everyone else got 1 cupcake (well except Jayson (my 3 yr old), he doesn’t eat cake—is he even related to me?!!)
So before we went to dinner I scarfed down a black and white….I needed it. It was a hell of a stressful day for me. So then we went to dinner….Casa Rita’s Mexican Grill. I wasn’t a fan but the drinks were good. And one kiddo had fun, lol!

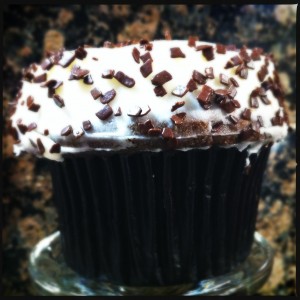
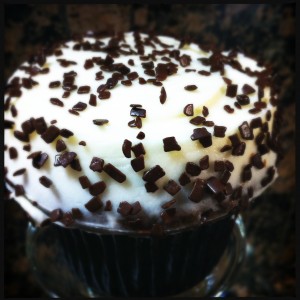
But….it must all come to an end as everything eventually does. Sending thanks to my family for another wonderful Birthday!! Here’s 1 last YUMMY look…..btw, I still have this one. There’s no way I could eat 3 of these in 1 day!
.
by jcastles | Mar 6, 2012 | Holiday Crafts
I wanted to share the few decorations I’ve made for St. Patty’s Day!
I used my same grapevine wreath I’ve been using since last summer! I just tear off (sometimes it’s a struggle, hehe) the previous decor and hot glue new on.
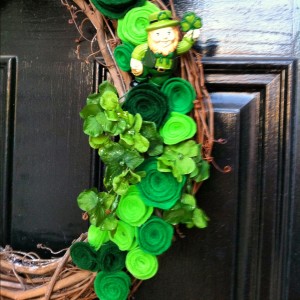
I didn’t have enough green felt so I grabbed 8 pieces at Hobby Lobby for $2.00. The Leprechaun and the greenery I got at Michaels for under $2.00!!! I used a cup, a bowl, and a wine glass to cut my circles out for the felt flowers. One day I’ll show a tutorial…lol! I then hot glued them on the wreath and stuck the Leprechaun and the greenery in the wreath w/out gluing so I can save those for next year!
Now…my favorite part of the decor!! My Mantel. I used some things that I’ll be able to use all of Spring so it’s not just for this month!
I used the same chalkboard vase (wine bottle) I used for Valentine’s Day…just wrote “Lucky” on it and drew a few clovers on it.
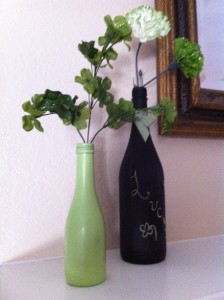
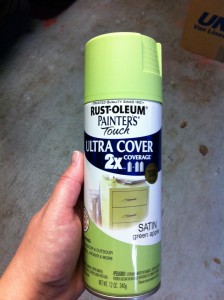
Next I used a mini wine bottle and painted it Satin Green Apple (by Rust-oleum). 2 coats and it was DONE! The best part is this vase will be good for Spring too!!
The vase fillers…..I liked the St. Patty’s day greenery so much I went back to Michaels and got 3 more things. All still under $2.00! These were actually cheaper $1.26! I cut the carnations to fit the larger vase and then just bent those and the shamrocks to my liking.
When I was at Home Depot getting my green apple paint I fell in LOVE with this other paint and HAD to get it!! It’s good for St. Patty’s Day (sorta..lol!), Spring, Summer and Fall!! Heck some people even work it in for winter! It’s called Satin Lagoon (by Rust-oleum again). Isn’t it pretty??
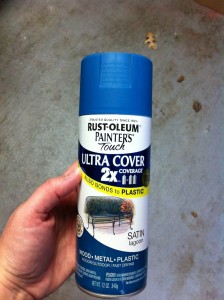
Ok ok…so you can’t really tell in that picture but it’s such a pretty teal! We had friends over last year and we were ummmm drinking…lol! Well I asked her to leave the empty bottle. It was all curvy and neat looking. So like 6 months later I peeled the label off, goo-goned the sticky, used paint lacquer to clean the goo off then painted it this LOVELY color (did you know I don’t paint the bottoms…why waste time and paint?!!?!)!! It’s still kinda hard to see how pretty the color is but it’s definitely one of my favs!
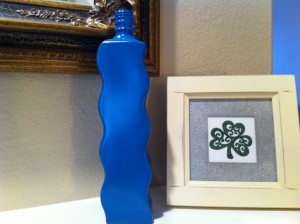
So you see that frame there. Well I got it at a local thrift shop for $1.99, brand new too!! So I got 2 cream ones and 2 navy ones for that price each. Figured I’d use them somehow and paint if needed! All I did was google shamrock and found this cute one. I resized it to fit my frame and printed it on cardstock and cut to the frame size.
So there you have it! My St. Patty’s day decor that will lead the way into Spring. I can’t wait to add some yellows and pinks in there! Maybe i’ll chevron paint the teal bottle with a pink! Oooooh, and a real pretty white flower will look awesome in it!
Don’t forget to wear your green March 17th!!
.


Recent Comments