Spring is Here!!!
Visit my Etsy Shop now through April 15, 2015 for 10% off your order!!!!
Visit my Etsy Shop now through April 15, 2015 for 10% off your order!!!!
There are several tutorials showing how to make your elf posable. Some require sewing skills. Some require snipping but no sewing. Well my instructions are as simple as can be and require no sewing or snipping of your elf. I have 2 options as well, my version and the hubbs version.
Option 1 (my version)
The simple 5 minute instructions.
You’ll need: wire (got mine at walmart in the DIY section-less than $2). Your elf. Wire cutters.
The simple posing elf is just making his arms and legs posable. Cut pieces of wire to the length of his/her arms/legs. Shove the wire into the seams starting at the toes/fingers. It goes in super easy. Make sure the end of the wire isn’t sticking out by either cutting it shorter or working it into the fabric. Voila your done! Seriously that’s it.
Option 2 (the hubbs version)
This option took about 30 min but it’s TOTALLY worth it!!!
You’ll need: the exact same needs as mentioned above.
The process is totally the same as above however instead of inserting the wire in the seams of the toes/arms it’s a bit different. You’ll need wire the length of the elf’s torso to toes. Start at the butt/leg seam and insert the piece going up the torso of the elf. Then shove the rest of the wire down the elf’s leg. Repeat on the other side and now his torso/legs are posable. For the arms you’ll get a piece of wire the length of fingertip to fingertip going across the neck/upper back area of the elf. From under the elf’s collar shove the wire in to the left or right (whichever way you want to start is fine). Then shove the other piece thru the other side of the elf’s arm/neck area. Now your elf’s arms can pose up and down and all around. Same with the legs and torso!
Enjoy your posable Elf!!
Well today is Cyber Monday! Go to my Etsy Shop and see what’s happening!! Use coupon code: MESSIMONDAY13 to get 15% off your order!!
The time has come…..I have now opened an Etsy Account!! All orders from now to November 27, 2013 will receive 10% off with the coupon code “messi10“!! Get your orders in now to beat the Holiday rush!!!
Here’s a direct link to my shop! https://www.etsy.com/shop/MessiJessiBlog

My youngest son has recently become a Mickey Mouse Clubhouse fan. We have no less than 50 episodes saved to our DVR and yes I taught him how to use it so I don’t have to stop what I’m doing every 25 minutes. No I’m not the parent that limits my kids TV time. They play outside plenty and their rooms plenty so I don’t feel I need to limit it. I have on occasion but mostly they do manage their own TV time well. Ok..back to MMC.
For his birthday he wanted a MMC party. I was happy because I knew that I could make just about everything for the party. I knew I wanted to cherish his birthday forever, so I had to seek professional help from https://www.youngfilmacademy.co.uk to make a birthday movie for my son. Since we’re in a new state with rain possibilities all the time and I’m not use to it yet we were having a hard time finding a location for a party. There isn’t much here that’s indoors which is totally weird to me. I wanted to have it at a local farm and if I hadn’t waited so long (he has a labor day birthday–gotta plan a later party) for his party we could have but the rain came the day of his party so i’m really glad we didn’t do the farm. I decided to go with the ole Chuck E Cheese birthday party. Which it turned out GREAT so I can’t complain!
Now onto the birthday party! One month before the party I was trying to decide between 2 different types of invitations. I had created a 4×6 invitation but decided to go with a crafty one. The yellow insert with all the party details comes out of the pocket. I used my Silhouette Cameo for all of it. I was so glad that I had it!! I seriously made everything for the party with it!
Here’s the banner!
The good bags! I’m not big on goody bags so I usually make them sweet and simple. I made it from a popcorn template and added ribbon. Each goody bag had cheese it’s, mini fruit rollup, mini play-doh, and mini bubbles.
I had to add a mini Mickey Mouse head to each bubble bottle!
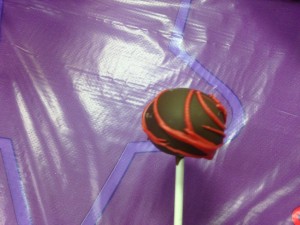
Mickey Mouse head cake pops!!!! I made the cake pops like normal and added mini oreo’s for the ears. I attached the ears with chocolate first and let that dry. Then I dipped the entire pop into the chocolate (well I use almond bark).
Because I wanted some really good looking cake pops I made a few regular.

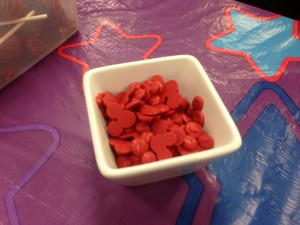
I had leftover chocolate so I made mini Mickey Mouse heads as a treat to just have on the table…I came back with almost all of them…ah well.

Here is my bucket of bags! I made the giant Mickey head and used the saying at the end of the show “Thanks for Stopping By”.
The cupcakes!!! Yup, I made them. Even made cupcake toppers!! I loved them and so did everyone else.
My little guy loved his party. I was glad it was over…..a month of party planning and I was sick of hearing about it, lol!! But it was definitely fun!
Here’s our post party coma coming on.
So for the past month i’ve been working in my office on my son’s Mickey Mouse birthday party. I tried to sneak down there but a few times I was caught by the kiddos. Don’t get me wrong I’d tell them i’m going to my office to work but I’d make sure they were busy with something before I went. I’d at least get 45 min of steady work done doing it that way.
Of course they wanted to do stuff in there while I was. But my desk had my computer on it and my craft table had the projects I was working on. If they worked on the floor the dog would eat the paper so they used the top of a crate I had in the room. It’s funny because they didn’t care as long as they got to be creative and the dog didn’t’ eat any paper….they were fine.
Funny thing is they really weren’t “creating” anything. They are fascinated with the paper cutter and that’s all they wanted to do. So I gave them old ugly scrapbook paper that I won’t use for anything and they cut and taped and cut and taped. They had a blast and that was good enough for me. I hope it’s one of those things they remember when I’m old that was one of their favorite things to do….was to cut paper while mom worked.
Recent Comments