by jcastles | Feb 13, 2012 | Holiday Crafts, Recipes

TOMORROW is Valentine’s Day!!!! Are you ready?! Apparently I am. We don’t do much around here for Vday but I do like to make stuff…food stuff for sure!
Since tomorrow’s the Big Vday I wanted to make my 3 yr old’s teachers some cupcakes. He has 8 teachers total (lots of therapy teachers). It was the easiest…no wait cheapest way out of getting a gift for all of them!
The Recipes
Remember those red velvet cupcakes I made in January….remember when I said I usually use a box mix. Well….box mix no more…sorta…kinda, ok it still uses the box but it’s easy people! Tidy Mom has the best cupcake recipe EVER!!! Wow oh wow do I mean EVER!!!
CLICK HERE FOR THE FABULOUS RECIPE!
Did you click it?? Save that recipe and keep reading.
I used this frosting recipe. It’s very similar to Wilton’s buttercream frosting and tastes just as good! I found it a little easier to make. I used Wilton’s pink and red red to get the pretty colors.
The making
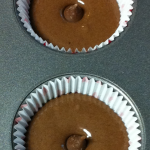
I made 24 red velvet and 24 chocolate fudge…..oh so yummy cupcakes! I’m not sure if you can tell but in this picture the chocolate cupcakes on the left are larger than the ones on the right….they have a treat baked inside!!

I filled the cupcake liners with the batter and in 12 I added an unwrapped hershey kiss! All you do is push it down in the mix! Bake as normal! However when you do the toothpick test do not stick it in the center of the cupcake. For a cute look I added an unwrapped heart dove chocolate to the red velvet cupcakes, so simple and just adds a little more yumm! These are the best homemade cupcake i’ve EVER had! Seriously, it is! I hope you try these!
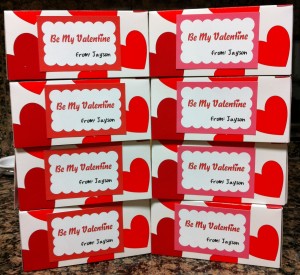
And here they are all boxed up and ready to go!
.
by jcastles | Feb 13, 2012 | Holiday Crafts
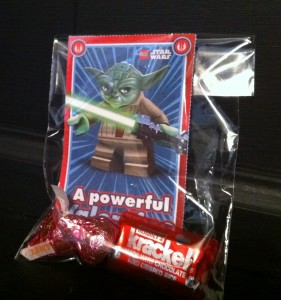
This year I wanted to make both my son’s Valentine’s cards. Well my 7 yr old wanted the store bought cards (he takes the easy way out), so we got him some Lego Star Wars cards….I then of course tweaked it. I got a package of 100 small cellophane bags (in the cake decorating isle at Hobby Lobby for $1.99….oh and I used my 40% off coupon here!)….the Vday specific bags were so expensive and you only got 12-18 in them, I had to go another route. So we slipped the card in the bag with a few pieces of candy and put the stickers that came in the box on the back to close the bag. Voila–cheap, easy and he’s happy!
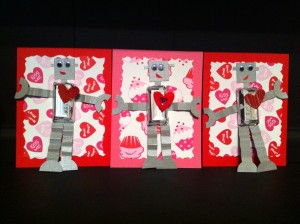
Since my 3 yr old is Autistic he doesn’t really grasp the idea of holiday’s yet. So he didn’t have the option of picking his Valentine’s cards out, lol! He’s into robot talk lately so I googled robot valentine’s and found this robot valentine. It looked so easy and I only had 3 to make so I couldn’t pass it up. I didn’t wrap my candy bar in scrapbook paper because with the valentine wrapping they came in was so cute!
I don’t have many craft tools because I usually can make do with what I have but I did buy a 1″ circle craft punch (it just made it easier…and I’ve been wanting it for a while–40% off at HL this week too!). So I went to work. I’m TOTALLY in love with these Valentine’s! Three were enough for me so I’m definitely happy I didn’t have more to do.
 .
.
by jcastles | Feb 1, 2012 | Holiday Crafts
Well I never really decorate in the house for Valentine’s day…not sure why I did this year. Maybe seeing all those neat mantel displays on Pinterest made me want to do it. Maybe me knowing for sure I’m not going back to work and had time was the culprit. Either way I decorated my mantel and I Love it!
 So let’s start with the plaque and the wine bottles. I used this printable for the wood. I originally wanted to put it in a pretty frame like I kept seeing people do online but I didn’t want to spend much (I mean I really didn’t want to pay more than $5) and EVERY frame I wanted was $10-$25. So I saw this piece of wood at Hobby Lobby for $1.99! So ummm, I had my hubbs spray paint it white for me (hehe!) and I sanded it to make it look a little less new. Then the night before I was going to work on it I thought…what if the ink runs?! So the next day I was prepared for this to be a big flop but was prepared to be ok with it since it was only $1.99! So I grabbed my mod podge (I have glossy–wish I had matte), a foam brush, the printable, my paper cutter and went to my dining room table that I covered with wax paper (i’m high tech here people!). I put my printable on the wood and bent the sides down to make a crease to get my desired size and cut the paper. Then I applied a medium coat of MP on the wood and stuck my paper on it. I smoothed the bubbles out with my hands (they do make a tool for this–I just don’t have it since um well it costs money I don’t want to spend just yet). So Since you can add MP on top as a sealer I added a thin coat. And yup, that’s where my ink ran. At first I was just going to quit but then I started to like the pink tone it gave. I mean after all it is for Vday! So I kept it and I actually really do like it. For the wine bottles they need to be empty and probably clean too..lol! So you can either be a lush and drink away or ask a local restaurant, friends or your local freecycle group for them. So once you have your bottles remove the labels with goo gone and then you’ll need to use laquer thinner to get the oil residue from that off (i guess that’s paint thinner–dunno my hubbs told me to use it) and then I spray painted it. I was going to paint the little one white and stensil a red heart on it but then I remembered I bought the chalkboard paint back in November for a project I still haven’t gotten around to. Then I decided to paint the other one red. I was going to punch out card stock confetti and glue it to the bottle but I thought it would look a little weird next to the plaque. So I found some pink ribbon and tied a bow.
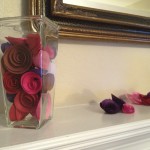 Next up are the paper flowers. I used this tutorial but I didn’t draw the spirals on the paper I just free cut those. I had most of the card stock for the paper flowers but wanted to add more colors so I went to Hobby Lobby and snagged a few more sheets…and bonus they were 30% off! It only takes about a minute or two to actually make the flowers and I did that while watching tv. I was originally going to make a few flowers grab some twigs for stems from our tree outside but then it started to rain and rain some more…wound up raining for a few days and I didn’t want to wait for those sticks to dry out so instead of buying twigs (oh yes…I priced those and OMG they are expensive!) I put them in a vase I already had and I think it actually turned out really cute! I then scattered a few remaining flowers on the mantel.
Now i’m all Valentiny! Happy Valentine’s Day people!!!
.
by jcastles | Jan 25, 2012 | Holiday Crafts
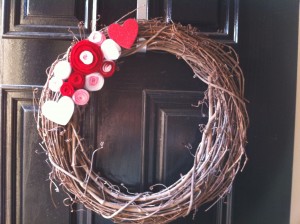 Well since you already know I’m not a romantic you might be questioning this post. Just because I’m not romantic doesn’t mean I don’t like pretty things! We took our Christmas décor down about the 2nd weekend of January and left a bare grapevine wreath on my door….which stayed for about 1.5 weeks….irritating the crap outta me!!! We had car trouble and I was just exhausted from it all……nothing was getting done! So finally last week I decided to make some felt flowers that I saw on Pinterest. I had scrap felt, the wreath, a hot glue gun…so my cost would have been $0.00 but I was browsing walmart that morning and saw a 4pk of large glitter foam hearts and loved them and they were only 97¢! The wreath took me about an hour to make. It’s simple, sweet, and I love it!.


Recent Comments