by jcastles | Feb 29, 2012 | Birthday Parties
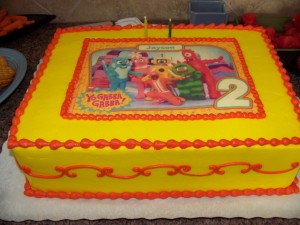
For my son’s 2nd and 3rd birthday we gave him a YGG Party. He loves YGG soooo much (well did–last year, lol). So for his 2nd birthday we didn’t do much decor but the cake was AWESOME!! We found an image online, blew it up, added the number 2 and sent it to a local bakery. We spent so much money on that darn thing and we threw half of it away. It just wasn’t as good as my normal bakery but geeeee I thought it was so far that particular day. Lesson learned…drive to the damn bakery! But it was still a beautiful cake….$80 worth!
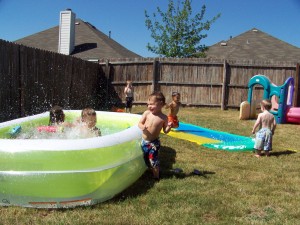
We had a small party. Just family and a few friends. Here in Texas it was still warm that early September day so we were able to get some last minute splash time in!
For his 3rd Birthday I had to get a little more creative….well since i’ve done it before it had to be better right?! Well of course I googled…and I even pinterested (yup, made that word up just now!).
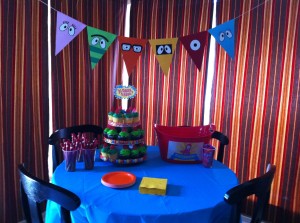
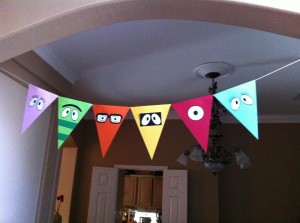
I LOVED the banner on this site so much I emailed her and she had sold hers on ebay recently but was sooooo kind she told me how she made it! Our banner, we actually loved it so much we made 2!!
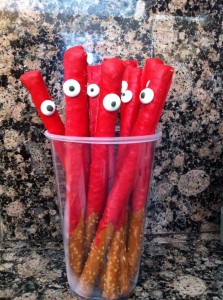
I saw these chocolate covered pretzels for a snack and didn’t want to do all the characters so I stuck with Muno only. EVERYONE loved them and OMG they were actually tasty. I’d never had chocolate covered pretzels like this before. They were very simple to make too! I melted wiltons red candy wafers in a tall cup, dipped and swirled the rods (tap excess off) and applied an eye (found a pkg at walmart el super cheapo!) while the melted chocolate was still wet, and let dry on wax paper.
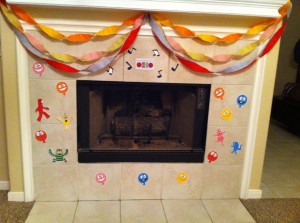
Then I found these cutouts on the YGG friends website. I printed on cardstock and cut out and just taped to our tile fireplace. And of course streamers!
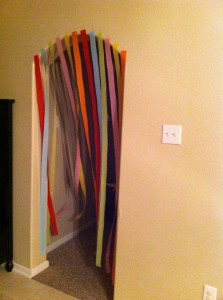
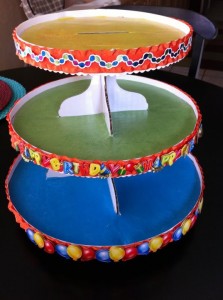
The cupcakes and cupcake stand! I didn’t have a ton of extra cash to just buy the cake stand I wanted so I got this $5 cardboard one and mod podged scrapbook paper and ribbon in YGG colors and used scrapbooking sticker decals for the Happy Birthday and balloons. Probably cost me about $7. For the cupcakes I had Kroger make me 12 chocolate and 12 vanilla cupcakes with 2 different colors of green frosting (about $16–hell of a lot better than that darn $80 cake the year before). Then I made the Brobee horns out of leftover candy wafers from the Muno sticks. With all the decorating I just didn’t have time to make the cupcakes…I know bad mom!

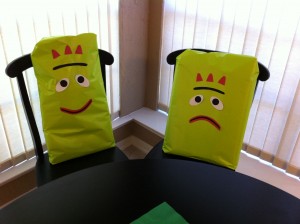
I had to have a little bit of character wrapping paper going on too! Easy peasy! Green wrapping paper and the same images from the banner…..cut and tape!
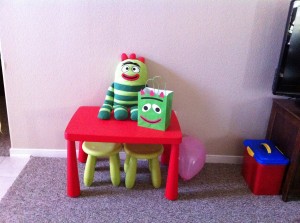
Now for one of the BEST things in my opinion! A life size DJ Lance Rock as soon as you walk in the door! My husband worked with a lady that just so happened to have one (weird I know!). I got helium balloons and clipped them to his hand and gave them away along with their party favor bag (bubbles and chalk) when they left.
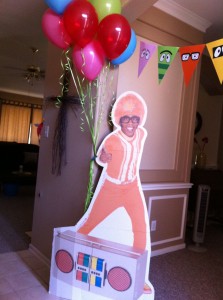
I LOVED this party!! So simple, so easy, and sooooo totally GABBA!!! We all had a blast! Especially this lil sweet birthday boy!
 .
.
by jcastles | Feb 28, 2012 | Uncategorized

Is potty training as easy as ABC 123….no it’s not! Today is the start of our adventure with kiddo #3.
As I’ve said before my 3 yr old is Autistic…so some things he just doesn’t get right away. Potty Training is one of them! His teachers at school have been working with him a lot and doing a fantastic and we’ve been trying at home w/out pushing too hard. The only time we could get him to even want to sit on the potty was at bath time. Last night that little booger sat on the potty for 20 min and nothing! He counted, he sang, he counted again…sang again and still nothing. We left the room, stayed in the room, stood by the door…nothing. Finally we were able to get him off–what kid just wants to sit there?! Every kid i’ve potty trained never wants on the potty (worked in daycare for a good while–i’ve seen my share of those kiddies)!
Well this morning he said the magical words….”yellow”. That’s how he tells us he has to potty. We went in and voila, it happened! We’re hoping for a continuation but who knows. Today could have been a fluke! Maybe not, I dunno..
by jcastles | Feb 23, 2012 | Recipes
It seems all I do around here is make cupcakes! Well I have 2 special events coming up where I’m making cupcakes….I need practice! Luckily most of these cupcakes I’m giving away! It’s a funny thing…I don’t actually like sweet sweets, lol!
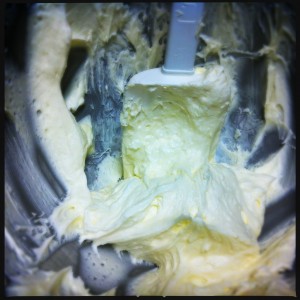
Most of my practice that was needed was making the frosting. I can make a delicious frosting but it’s never as thick as I want it to be and in the end I have powdered sugar ALL over my kitchen! Well as of today those days are OVER!! I have found the secret and am here to tell you what that is!
Ingredients
- 1 cup unsalted butter (2 sticks), softened (not melted!)
- 3-4 cups confectioners (powdered) sugar
- 1/4 teaspoon table salt (only if you use unsalted butter)
- 1 tablespoon vanilla extract
- up to 4 tablespoons milk or heavy cream
What to do
Beat butter for a few minutes in a mixer (paddle attachment works best). TURN OFF MIXER, so the sugar doesn’t blow everywhere! Add 3 cups of powdered sugar and then mix on the lowest speed until you have little clumpy sugar butter bits. Increase mixer speed to medium and add vanilla, salt (if you used unsalted butter), add 2 tbsp of milk or cream and beat for 3-4 min. If your frosting is too thin add more of the powdered sugar. If too thick add more milk/cream 1 tbsp at a time. Mix to the consistancy you want and voila. You’ve made beautiful sweet tasty home made frosting!!
Tip- To make the consistency you see on this cupcake I used 3 cups of powdered sugar and 1 tbsp of milk plus all the other ingredients.
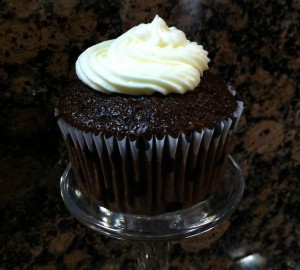
.
by jcastles | Feb 20, 2012 | Recipes
It’s time to talk good ole comfort food. This side dish is so good you could eat it by itself! It’s definitely a favorite in our house.
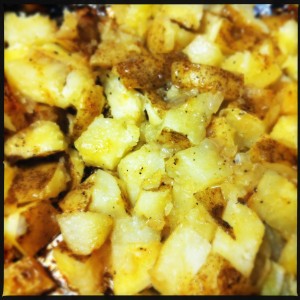
Recipe (this recipe is for 6 small/medium taters)
potatoes, washed (1 potato per person; with or w/out skin)
1/2 medium purple onion, finely diced
1/2 stick butter (or 4 tablespoons if using tub)
cajun seasoning (we like Pamepered Chef’s)
montreal steak (McCormick–YUMM!)
seasoning salt (Lawry’s; about 1 tablespoon)
couple dashes salt/pepper
2 pieces of foil (about 10″ each for 5-6 taters)
ketchup (for smothering them in when they’re done!)
What to do
Wash taters. Peel if desired (we do 2 for the kids). Dice taters. Lay 1 sheet of foil down and put taters on top (leave about 1/2 inch around the edges you’ll need this later). Finely dice your onion and add to top of taters. Scatter your butter on top of taters. Add a good amount of seasoning salt. A couple dashes of salt/pepper. And if you’d like a lil kick add a couple dashes of montreal steak seasoning and cajun seasoning. Put your other piece of foil on your taters and roll all the sides up to create a closed pocket of taters. Bake at 350° for about 25-35 min on a cookie sheet. Or you can do our preferred method and cook directly on the grill for about 25 min. When done cooking open foil (you might even have to cut open)…BE CAREFUL, the steam is super hot. Add ketchup and enjoy!
**Remember if your making a smaller/larger amount your cook time will vary…the time and ingredients given above is based on our recipe of 5-6 small/medium taters.
I hope you enjoy them as much as we do. They go great with any kind of meat, sloppy joes, hot dogs, & hamburgers! Basically anything you’d eat a french fry with, lol!.
by jcastles | Feb 16, 2012 | Family

Web hosting is essentially a place for your website to live. From that point forward, you can manage and control your website as you please.
For web hosting, you will have several options. You can choose from virtual private servers (VPS)to dedicated servers. For this tutorial, I will be using a VPS from DigitalOcean. Once you have decided on a hosting provider, check out the websites of the providers to see what kind of packages are included.
The ideal website I would like to have is simple and easily customizable. As I mentioned earlier, you can edit any or all of the files you want, however, I would like a little more control. On top of WordPress, I will be using Zen Hosting as my blogging platform, so I will be using this platform as my base of operations. I won’t be needing to tweak my website much other than making minor changes and running a few tests to ensure everything is working properly. I always find it’s very important to also hire a local web designer, we recently needed a web site for a local area so hired a great web designer in Bridgwater as that was where that business operated and it just worked brilliantly as they obviously understood what was appreciated in that area.
I will be using WordPress, but all instructions in this section will apply to the use of any other blogging platform you might choose to use. You might want to start with your host to decide which of their platforms to use, since there are different options for web hosting, and services that offer dedicated hosting service for specific business as well.
Now that you know a little about creating and running a website, it’s time to create your first website. It will be a simple page that lists my favorite movies on YouTube. Upon clicking on the Site From link, you will be taken to a page with a File download button. Click that link, and you will be taken to a screen where you can enter the following information:
Hostname: YOUR-HOSTING-PROVIDER.digitalocean.com (Choose the best one!) Password: Do not use the same password you have used to sign up to your WordPress site, as you will be creating a new one (and therefore we will be using a different password). This will be your site’s username and password. You will be given a username and password when you sign up to WordPress. Use these!
Type: Blog (Choose the blog you will be blogging under) Filesize: 15MB (You can use a bit smaller or larger. I’m going to be posting a lot of data here, so you can feel free to use a smaller one if you like.) Note: Make sure you can access your WordPress dashboard if you are using Zen Hosting.
When you are ready, click the Download button, and we are done! Click the Apply button to save your changes. For security, you can choose to use a different username and password at any point. This is absolutely no need to do this if you are using this website as your main website.
Great job! You have just created your very first website, and now you need to get it running.
If you want to be able to track your progress, you will need to log in to your WordPress dashboard with your chosen username and password.
by jcastles | Feb 13, 2012 | Holiday Crafts, Recipes

TOMORROW is Valentine’s Day!!!! Are you ready?! Apparently I am. We don’t do much around here for Vday but I do like to make stuff…food stuff for sure!
Since tomorrow’s the Big Vday I wanted to make my 3 yr old’s teachers some cupcakes. He has 8 teachers total (lots of therapy teachers). It was the easiest…no wait cheapest way out of getting a gift for all of them!
The Recipes
Remember those red velvet cupcakes I made in January….remember when I said I usually use a box mix. Well….box mix no more…sorta…kinda, ok it still uses the box but it’s easy people! Tidy Mom has the best cupcake recipe EVER!!! Wow oh wow do I mean EVER!!!
CLICK HERE FOR THE FABULOUS RECIPE!
Did you click it?? Save that recipe and keep reading.
I used this frosting recipe. It’s very similar to Wilton’s buttercream frosting and tastes just as good! I found it a little easier to make. I used Wilton’s pink and red red to get the pretty colors.
The making
I made 24 red velvet and 24 chocolate fudge…..oh so yummy cupcakes! I’m not sure if you can tell but in this picture the chocolate cupcakes on the left are larger than the ones on the right….they have a treat baked inside!!
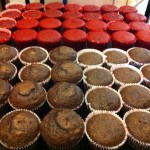
I filled the cupcake liners with the batter and in 12 I added an unwrapped hershey kiss! All you do is push it down in the mix! Bake as normal! However when you do the toothpick test do not stick it in the center of the cupcake. For a cute look I added an unwrapped heart dove chocolate to the red velvet cupcakes, so simple and just adds a little more yumm! These are the best homemade cupcake i’ve EVER had! Seriously, it is! I hope you try these!
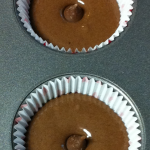
And here they are all boxed up and ready to go!
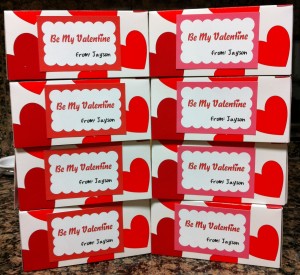
.
by jcastles | Feb 13, 2012 | Holiday Crafts
This year I wanted to make both my son’s Valentine’s cards. Well my 7 yr old wanted the store bought cards (he takes the easy way out), so we got him some Lego Star Wars cards….I then of course tweaked it. I got a package of 100 small cellophane bags (in the cake decorating isle at Hobby Lobby for $1.99….oh and I used my 40% off coupon here!)….the Vday specific bags were so expensive and you only got 12-18 in them, I had to go another route. So we slipped the card in the bag with a few pieces of candy and put the stickers that came in the box on the back to close the bag. Voila–cheap, easy and he’s happy!
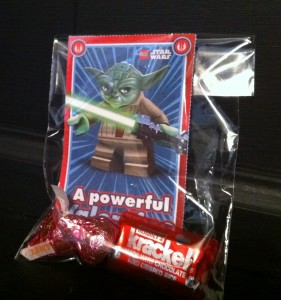
Since my 3 yr old is Autistic he doesn’t really grasp the idea of holiday’s yet. So he didn’t have the option of picking his Valentine’s cards out, lol! He’s into robot talk lately so I googled robot valentine’s and found this robot valentine. It looked so easy and I only had 3 to make so I couldn’t pass it up. I didn’t wrap my candy bar in scrapbook paper because with the valentine wrapping they came in was so cute!
I don’t have many craft tools because I usually can make do with what I have but I did buy a 1″ circle craft punch (it just made it easier…and I’ve been wanting it for a while–40% off at HL this week too!). So I went to work. I’m TOTALLY in love with these Valentine’s! Three were enough for me so I’m definitely happy I didn’t have more to do.
 .
.
by jcastles | Feb 12, 2012 | Uncategorized
It’s a little chilly in Texas this weekend! Our high today was 38˚ but the feel like temp is 31˚. We were in the 70’s just last week! So yes everyone’s a bit sniffly.
Cold weather always makes me want to curl up by the fire and have comfort food!! So I enjoyed a nap by the fire yesterday and we are having Chicken and Dumplings for dinner tonight!
Image is directly from www.PolishTheStars.com
It’s easy and it’s fantastic every time! I add a little bit of seasonings (montreal chicken by McCormick and a little salt/pepper) and an extra cup of chicken stock (I use chicken bullion cubes) because it was a little too thick for my family. But it’s still fantastic the way the recipe is.
Hope you all had a great weekend! Off to finish the last set of Valentine’s for the kiddies and prepare the Teacher’s Valentine’s Day Cupcakes (another fun post coming soon!)!
.
by jcastles | Feb 1, 2012 | Holiday Crafts
Well I never really decorate in the house for Valentine’s day…not sure why I did this year. Maybe seeing all those neat mantel displays on Pinterest made me want to do it. Maybe me knowing for sure I’m not going back to work and had time was the culprit. Either way I decorated my mantel and I Love it!
 So let’s start with the plaque and the wine bottles. I used this printable for the wood. I originally wanted to put it in a pretty frame like I kept seeing people do online but I didn’t want to spend much (I mean I really didn’t want to pay more than $5) and EVERY frame I wanted was $10-$25. So I saw this piece of wood at Hobby Lobby for $1.99! So ummm, I had my hubbs spray paint it white for me (hehe!) and I sanded it to make it look a little less new. Then the night before I was going to work on it I thought…what if the ink runs?! So the next day I was prepared for this to be a big flop but was prepared to be ok with it since it was only $1.99! So I grabbed my mod podge (I have glossy–wish I had matte), a foam brush, the printable, my paper cutter and went to my dining room table that I covered with wax paper (i’m high tech here people!). I put my printable on the wood and bent the sides down to make a crease to get my desired size and cut the paper. Then I applied a medium coat of MP on the wood and stuck my paper on it. I smoothed the bubbles out with my hands (they do make a tool for this–I just don’t have it since um well it costs money I don’t want to spend just yet). So Since you can add MP on top as a sealer I added a thin coat. And yup, that’s where my ink ran. At first I was just going to quit but then I started to like the pink tone it gave. I mean after all it is for Vday! So I kept it and I actually really do like it. For the wine bottles they need to be empty and probably clean too..lol! So you can either be a lush and drink away or ask a local restaurant, friends or your local freecycle group for them. So once you have your bottles remove the labels with goo gone and then you’ll need to use laquer thinner to get the oil residue from that off (i guess that’s paint thinner–dunno my hubbs told me to use it) and then I spray painted it. I was going to paint the little one white and stensil a red heart on it but then I remembered I bought the chalkboard paint back in November for a project I still haven’t gotten around to. Then I decided to paint the other one red. I was going to punch out card stock confetti and glue it to the bottle but I thought it would look a little weird next to the plaque. So I found some pink ribbon and tied a bow.
 Next up are the paper flowers. I used this tutorial but I didn’t draw the spirals on the paper I just free cut those. I had most of the card stock for the paper flowers but wanted to add more colors so I went to Hobby Lobby and snagged a few more sheets…and bonus they were 30% off! It only takes about a minute or two to actually make the flowers and I did that while watching tv. I was originally going to make a few flowers grab some twigs for stems from our tree outside but then it started to rain and rain some more…wound up raining for a few days and I didn’t want to wait for those sticks to dry out so instead of buying twigs (oh yes…I priced those and OMG they are expensive!) I put them in a vase I already had and I think it actually turned out really cute! I then scattered a few remaining flowers on the mantel.
Now i’m all Valentiny! Happy Valentine’s Day people!!!
.
by jcastles | Jan 25, 2012 | Holiday Crafts
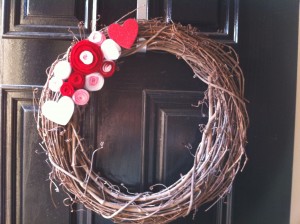 Well since you already know I’m not a romantic you might be questioning this post. Just because I’m not romantic doesn’t mean I don’t like pretty things! We took our Christmas décor down about the 2nd weekend of January and left a bare grapevine wreath on my door….which stayed for about 1.5 weeks….irritating the crap outta me!!! We had car trouble and I was just exhausted from it all……nothing was getting done! So finally last week I decided to make some felt flowers that I saw on Pinterest. I had scrap felt, the wreath, a hot glue gun…so my cost would have been $0.00 but I was browsing walmart that morning and saw a 4pk of large glitter foam hearts and loved them and they were only 97¢! The wreath took me about an hour to make. It’s simple, sweet, and I love it!.


Recent Comments